top of page


A guide to setting up a Fresh Install of Ubuntu
In this guide, I will attempt to make it easy to set up Ubuntu with GQRX, GNU Radio Companion, WxtoIMG, and Tools for Decoding Meteor M2 Sats. So lets keep it simple, and get stuck in. Grab Yourself a Beverage.
I am going to presume that You have an RTL Dongle and have a fresh install of Ubuntu.
PLease note: This first Section, is for those that have an additional Sound Card, and there is no sound. If your sound is working ok, plesae Skip this part!
with any fresh install of Ubuntu I have an Issue which may or may not be a problem for you. The HD Audio on My GFX Card Takes Priority over my soundcard. If this is an issue for you, then You can either follow or skip this bit.
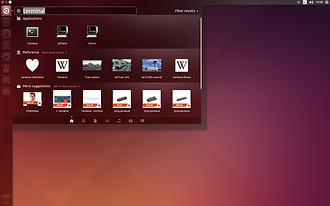
Open the Dashboard by clicking on the Ubuntu Logo (top left) and Type Terminal, then click on the black Terminal icon.
Copy and paste the following into the terminal window, and press enter. You will be promted for your password as sudo uses your computer as root. You will not see anything being typed, and press enter. ( A text Doccument will open in Gnome Edit)
sudo gedit /etc/modprobe.d/alsa-base.conf

Copy and paste the following into the text doccument, and save it. This will now prevent HDA intel from taking priority. You need to reboot for this to take effect.
blacklist snd-hda-intel

Open a Terminal window and copy and paste the text below. This will open the Alsamixer. Use the arrow keys to navigate to the DAC levels and turn them up. Once You have done this. Use the Esc key to exit Alsamixer. The two images below the example show before and after the blacklist was applied.
alsamixer


If the first part was of no use to You at all, here is where the guide starts for You. Open Ubuntu software Centre (The orange bag with an 'A' on it). and search for 'synaptic package manager'. It's a shame this was removed from default installations of Ubuntu, as You can find loads of useful tools that are not available in th software centre. We will use this a few times during this guide. so go ahead and get that now.

Once that has installed, open it, close the dialogue box if it shows, and then click on reload. Let it reload, and close it once its completed. We will use it later on.

For this guide we will be installing two Windows programmes, as I'm yet to find a way to do it natively Needless to say, I will change this guide if I find a sollution. We are now going to install WINE. WINE is a self nested acronym that stands for (Wine Is Not an Emulator), but what it does do, is to provide us with the abillity to install a few prgrames we will need. We shall be using the information at
https://www.winehq.org/download/ubuntu
We are going to use the Terminal again to install this, so open up a Terminal window, and copy and paste the following and press Enter.
sudo add-apt-repository ppa:ubuntu-wine/ppa

Then copy and paste the following in to the terminal and press enter.
sudo apt-get update
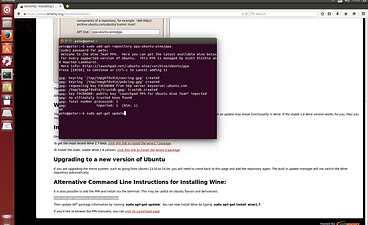
Once that has finnished, You can now install WINE. Copy and paste the following into the terminal. Press Enter and input Your Password.
sudo apt-get install wine1.7

You will be asked if you want to continue. put a 'y' and press enter. If You get two further dialogue screens like below, Accept them!


We are nearly ready to start installing the applications we need. We are going to create another blacklist file. This time, it's so that Ubuntu does not see your RTL dongle as a TV Donlgle. Open up a terminal window. Copy and paste the following into it, press Enter, type Your Password, and press Enter. A folder will open. Just keep this open for a moment, as You need to create an empty file in the next step. Due to my limmited knowledge, I am unsure of how to create a file in the Root folder we just opened. so You are going to create it on Your Desktop, and drag it into the folder in the next step.
sudo nautilus /etc/modprobe.d

Right Click on Your Desktop and select New Doccument/Empty Doccument. Rename it to no-rtl.conf. Once You have done this. Drag the new file into the modprobe.d folder.
no-rtl.conf
Now double click on the no-rtl.conf file and copy the following text into it, and save the file. then close that folder.
blacklist dvb_usb_rtl28xxu
blacklist e4000
blacklist rtl2830
blacklist rtl2832

Reboot your PC again, and then we can start installing GQRX, GNU Radio and so on.
Open a Terminal Window to add the repository for GQRX to Your Software Sources. Copy and Paste the following text, and press Enter.
sudo add-apt-repository ppa:gqrx/releases


Press Enter to continue
This will now add the Repository

Now refresh the list of available Software by running the following, as we did earlier.
sudo apt-get update
We can now install GQRX, Copy and Paste the following into a Terminal Window, and press Enter.
sudo apt-get install gqrx

You will be asked if You want to continue, put 'y' and press Enter.

Since GQRX uses GNU Radio Companion in the Background, This will also be installed at the same time. So sit back for a while. And when its finally installed, Plug in your RTL Dongle, and start GQRX from the Dash.

You can click ok at this settings window. You can learn the finer details outside of this guide.

Have a quick play, and confirm that it's working. As default the gain is turned right down, and AGC unticked. so make sure you adjust that before You think it's not picking up any signals.

So that's the Sound, GQRX and GNU Radio Companion Set up. Now we are going to download a Python Script for GRC for receiving Meteor M2 Signals. I have borrowed this from another guide, which talks about doing half of the process in Ubuntu, and then swapping over to windows to complete the process. We will need to modify one line of this script, so that it works for us. Here is the link to the site, as there might be other things You can learn from it, and not only that, I'd feel a bit cheeky using someone else's work and passing it as my own, which I'm not!
http://www.geo-web.org.uk/PDF_Files/meteor-rtl.pdf
Here is a link to the Python Script mentioned in the Article.

Once this has downloaded, open and extract to Your Home Direcotry.


We now need to modify the Script before we can give it a test run. So go to Your Home Directory. Right Click on the meteor_qpsk_rx_rtl.py file and open with Gedit. Once this is open Press 'CTRL and f' on Your keyboard, and type 'ubuntu' in the search box. You are looking for a line like in the image below. Simply replace the word ubuntu with the name of Your computer. as in my example, and then save the file. As I say, You can learn more from the link above, about creating a shortcut and a few other things. You can learn how to do that outside of this guide.

So now lets confirm that the python script opens LRPT Soft Symbol Receiver. To do this, Copy and Paste the following into the Terminal, and press Enter.
python meteor_qpsk_rx_rtl.py

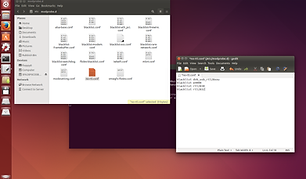
This is what You should be seeing. Notice the file on the Desktop. This is the Data file that will be loaded into LRPT offline Decoder after You have recorded a pass from Meteor M2. so once You confirm that this is working, close it, and Delete the file on the Desktop.

So that's Meteor M2 Sorted, let's install WxtoImg for the NOAA Satellites, in this example I'm using a 32 Bit Installation, and therefore I chose to download the Latest Beta as a 32 Bit .Deb file, as in the Image Below. Here is a link to the dowload page. Go ahead and download it.

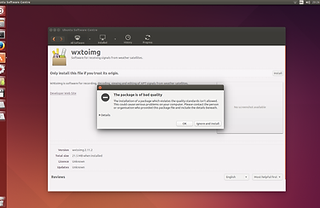
Once this has downloaded, open with Ubuntu Software Centre, and Intsall. You will get an error telling You that the package is of bad quality, just accept and continue.


Once this has installed, we shall confirm that it starts. To do this, it needs to be started from the Terminal. Again, with further research, You can make a shortcut to a program that starts from the terminal, but for now, open a Terminal Window and copy and paste the following and press Enter.
xwxtoimg

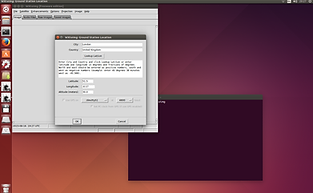
You will now be presented with Several Screens. Accept the Terms and Conditions, close the screen regarding calibration (You may or may not need to do this) and Enter Your Ground Location. I had to enter a city that was 10 miles away, so it's close enough. You will then be presented with the Main WXtoIMG screen. There are things for you to set up, but You can read the manual or just have a play about with the settings. I will go through receiving an Image later in the Tutorial. We still have a little way to go though.


Here is where it gets a little bit messy, and maybe someone could help resolve this issue. Linux in general is very good at routing audio from one place to another, but because the NOAA APT Satellites sends its DATA at 11025KHZ, and Your USB Dongle is at 48000KHZ, Simply asking WXtoIMG to capture the Audio using a form of loopback, will result in a gargled image, so for this reason we can't decode in realtime. Needless to say, if You have a dedicated Hardware Receiver and You set WXtoIMG to capture through the Line in You would not have this issue. As we can't capture in realtime, we will be using GQRX to capture an Audio File, A nice simple Terminal command to Resample the File that GQRX outputs to 11025KHZ, and then another command to give the new file the same time stamp as the original file. So we need to install only one of these command line programmes, and that's called sox. So open the Synaptic Package Manager that You installed earlier, and do a search for sox.
sox
Click on the box to the left of where it says 'sox', then click on 'Mark' in the box that opens. Now click the Green apply button. This will install sox. I'll be showing you how to use this later.


Now we shall move on to the reason why we installed WINE. as the next few applications relate to processing Meteor M2 DATA. As of this Tutorial, I'm unaware of a way to do this natively. I've provided 2 links to this application, for the purpose of this Tutorial, Use the first link, as I know it works with this Tutorial. The 2nd link has more up to date versions of the LRPT offline Decoder that we are about to install.

Extract LRPT offline Decoder to Your Desktop. Then right click on LRPTxxxx.exe and open with Wine Program loader. It will ask to install both Wine Mono and Wine Gecko installer. So choose to install them. You will only be asked to do this once. LRPT offline decoder should then start . If not, open it again, now that the installers have been installed.


We are going to install one more program, This corrects the BMP that LRPT offline decoder outputs, by slightly widening the image. So go ahead and download Smooth Meteor.
Right click on the Smooth Meteor exe you just downloaded, and again open with Wine Programe Loader, and install it. You can find a shortcut to this in the dash by typing smooth. Open it, to check that it works.


So in terms of installing software, that's all we need to do. I'll now explain how you use everything that you have just installed. Perhaps You should take a break at this stage.
We will now move on with how to use everything. We will start with Meteor M2.
Open LRPT Soft Symbol Receiver when Meteor M2 is coming into range. It will start saving DATA to your desktop, If all is going well, You should See a constellation like the Image Below. Chances are, You are going to have to play with the settings over the coming days to work out what works best.
On the page where You downloaded this from, is a guide to making a script, which will contain the optimum settings that work best for you. And then You will be able to start it with Your script.
python meteor_qpsk_rx_rtl.py

When you no longer have a good constellation, and the pass is over, press stop in the bottom right of the receiver. And then close it.
So the next step is to open LRPT offline Decoder, and process the DATA. As this is a Windows application, it's far from perfect, but works in a round about way. In windows, You would usually click on the '72k' button and navigate to the file you want to process, and let it do its job. Which only takes about a minute. However, using this application under WINE, takes an eternity to do the same thing. So we are going to click on 'hard to soft' and load the file on Your desktop and quickly convert it. This will put a new file on Your Desktop, now click on '72k', and load the new Hard to Soft version of the file. This will now begin to decode the DATA, and start displaying Your image. It will also place a handfull of files on Your Desktop. Once You have completed the process, You can simply delete these files.


We now want to make our Image colour. To do this, we must alter the RGB settings, as per the picture below, and then press Generate RGB. You should now see a colour Image. Again, as this is windows application, its functionality is not perfect. Click on 'Save' in this window with the colour image. You may, or may not see an option to save as JPG or BMP. For me it did not show, but I could tell I was clicking on 'Save', and spotted that a BMP had been saved to my Desktop. So despite not being able to save as a JPG, it works fine. The BMP files are much better anyway.

You should now have a a BMP on your Desktop, So close LRPT offline Decoder, and delete all of the files it generated, other than the BMP of course. Open Your BMP and have a marvel at it. then close it, as there is the final stage of rectifying the image.

Open Smooth Meteor from the Dash. Once it has opened, click on Load image, and load your BMP. Then click Rectify. A new window will pop up showing a before and after. Click on Save as BMP in the first window. And that's it., You now have an image. You will find a Video on this site showing how to clean up error lines. I perhaps should mention that you will get an error line about every 6 and a half minutes, this is due to a fault with the Satellite. Other lines are drops in signal, or other factors such as Pager Systems here in th UK.
Lets move on to the final part of this guide, on how to decode NOAA Satellites.
At the time of writing this guide, there are 3 active NOAA Satellites that Pass close enough twice a day. Generally Morning and Afternoon Passes. NOAA 15 - 137.6200MHZ, NOAA 18 - 137.9125MHZ, and NOAA 19 - 137.1000 MHZ. Sometimes Meteor M2 and NOAA 19 can pass at nearly the same time, thus cancelling each other's signal out for part of the pass, as Meteor M2 also uses 137.1000MHZ. This is also true of NOAA 15 and 18, as they can pass by at simmilar times, but not for the most part .
So go ahead and Open GQRX from the Dash, and I'll do my best to explain how to use it.
On left of the top half of the screen, You will see a scale running vertically. if You hold Your Mouse pointer over the scale, You will notice it changes to a hand, If You hold left click, You can now pull this up or down. This can be useful when trying to spot week signals, or just generally to look more pleaseing to the eye.

Also on the top half of the screen running horizontally is another Scale. This works in 2 ways. If you hold Your mouse over the Scale, and use the Scroll wheel on Your Mouse, You can zoom in in and out. And if You hold Your Mouse over the Scale and press the Left Mouse button, You can drag left and right (This does not affect the frequency that You have tuned in.

To change the frequency, place Your Mouse Pointer over the digital readout, and move Your scroll wheel over the Digit that You want to change. You can also change the frequency by placing You mouse pointer over the Grey Bar with the red line running through the middle of it, left click and drag left and right.
So now look over to the right of the screen, and click on the Receiver Options tab, and change 'Mode' to Narrow FM, then click on the Spanner and Screwdriver Icon next to it, and change 'Max Dev' to 'APT 17K ' and 'Tau' to 'Off'. This is a special mode for NOAA Satellites. If You move Your mouse pointer to the edge of the Grey bar in the waterfall, You will notice it change to arrows at an angle. left click and drag this out to '45k', You will see the Value change where it says 'Filter'. This can be a little bit frustrating to do, but if you zoom in plenty enough while you do it, it's much easier to do. You can soon zoom back out. An important thing to note, is when we get on to recording the pass, do not alter the filter bandwidth, by all means adjust the fequency to account for dopplar correction, but changing the filter bandwidth will result in an image that is a little skewed.

Now change to the Input Controls Tab. Put a Tick in DC rem, and it's up to You if you use Hardware AGC or if You want to manually Adjust the LNA Gain Yourself. Either way, we need some gain to be able to receive a signal.
The Audio Tab is where we shall record the pass. In the Image below I have clicked on the Screwdriver and Spanner Icon. This gives You an option to change the location of where GQRX will output it's audio file. For the purpose of this tutorial, keep it as default. I have my gain set to -'8.3 db', this might be a little too loud, so You might want to experiment over the coming days, and see what works well for You. I will leave You to play around with the FFT settings, as they make no difference to what we are doing. and all depends on the power of Your PC, as to how You set them.

OK, that's The SDR set up and ready to record a pass from NOAA. So minimize GQRX, and open a Terminal Window and copy and paste the following to open WXtoIMG.
You can create a shortcut to an application that starts from the Terminal, but for the purpose of this Tutorial we are going to use the command line.
xwxtoimg
Go to file and Update Keplers. You need to do this regularly, You can make it so that wxtoimg updates them on startup. Now go to Satellite pass list and make a note of the next pass you are going to record. dont worry too much about the seconds, but when we get on to recording. Try and start recording as close as possible to the time that WXtoIMG states. O.K, for now, close WXtoIMG, and lets go back to GQRX.

So its close to the time of the start of the pass, Press Record at the time that WXtoIMG suggested, and hopefully you should start to see and hear the NOAA Satellite coming into Range. You might want to adjust the frequency using the grey bar, so that the red line is as near as damn it in the middle, and You might need to do this about twice during the pass. I'm still to learn about setting up GQRX to alter the frequency to account for dopplar correction, so welcome suggestions to add to this guide.
Once the signal has faded and the satellite has passed. press the record button again to stop the recording. and close GQRX.
I'm sure You will be pleased to hear that we are getting close to the end of this tutorial. So the Next thing we are going to do is to re-sample the file that GQRX outputted to 11025KHZ. This is where You need to pay attention. Hence the reason for leaving it to the end of the guide, and the reason why I insisted that you got used to using the Terminal.
Open a Terminal Window and type 'ls'
ls

look for the file wav file that starts with GQRX in its title. Highlight the text, by holding the left mouse button from one end of the file and drag. Now right click on the highlighted text and select copy.
We shall now create a new file at 11025khz by using the sox command. So in a terminal Window type sox followed by the name of the file that you just copied (CTRL SHIFT and V to paste), and then give a name to the new file, of the date and time of the pass, followed by 'rate 11025'. so it will look something like this.
sox gqrx_20150818_025821_137100000.wav 08180258.wav rate 11025
(Press Enter)
This will take a few seconds to do. You will have a new wav file in your home directory at 11025KHZ. We are now going to give the new file the same timestamp as the original file, so that wxtoimg will recognise the pass. We do this by issuing the Touch command. We didn't need to install this, as it is a default command line utility.
To do this, we do the following in the terminal window.
touch 08180258.wav -r gqrx_20150818_025821_137100000.wav
(Press Enter)
This will only take a second to do. We are now ready to load the new wav file into WXtoIMG.


Open WXtoIMG again ( You can do it on your own this time). Click on File/Open Audio File, and load the file that you made with sox. 08180258.wav (for example)


And that completes this guide, which has most Probably taken me a good 20 hours to do ;-) I hope You have found it informative and useful, regardless as to whether it was for weather Satellites or getting GQRX and GNU Radio working in Ubuntu. I also have a lot to learn still, but this will have saved You several more hours of Your life. I reccoment good housekeeping, so that you don't end up with hundreds of wav files on your PC. Delete them, once you are done with them!
bottom of page